Why Use a Point-to-Point Wireless Bridge?
In an era where connectivity is king, a Point-to-Point (PtP) Wireless Bridge is the ultimate solution for extending networks over long distances without the hassle of running cables. Whether you’re linking two buildings, extending your network to a remote security camera, or delivering internet to an offsite facility, a PtP bridge ensures a stable, high-speed wireless connection over miles.
At GNS Wireless, we specialize in providing robust, high-performance PtP wireless solutions. In this guide, we’ll walk you through everything you need to know—from choosing the right equipment to setting up your bridge like a pro.
Real-World Example: How a Construction Company Eliminated Expensive Cabling Costs
Customer Story: Jackson & Sons Construction, a mid-sized construction company in Texas, needed high-speed internet connectivity between their main office and a remote job site half a mile away. Running fiber would have cost over $10,000, but a PtP wireless bridge setup with GNS Wireless high-performance bridges cost them under $1,800 and was installed in a single day.
“The wireless bridge was a game-changer for us,” says Tom Jackson, IT Manager. “We got seamless connectivity without breaking the bank. The speeds are as good as a wired connection!”
Step-by-Step Guide to Setting Up Your Wireless Bridge
1. Choose the Right Equipment
Selecting the right PtP bridge depends on factors like distance, bandwidth needs, and environmental conditions. Here are our top recommendations:
-
Short-Range (Up to 1 Mile): GNS Wireless 5 GHz PtP Wireless Bridge (GNS-1153AC)
-
Mid-Range (1-5 Miles): GNS Wireless 5.8 GHz High-Speed Bridge (GNS-1155AC)
-
Long-Range (5+ Miles): GNS Wireless Long-Distance Gigabit Bridge (GNS-5423-HD)
Each unit features weatherproof enclosures (NEMA-rated) to withstand harsh outdoor conditions.
2. Mount and Align Your Antennas
-
Place your antennas on stable mounting poles or rooftops.
-
Ensure clear line-of-sight (LOS) between the two locations (no trees, buildings, or obstacles).
-
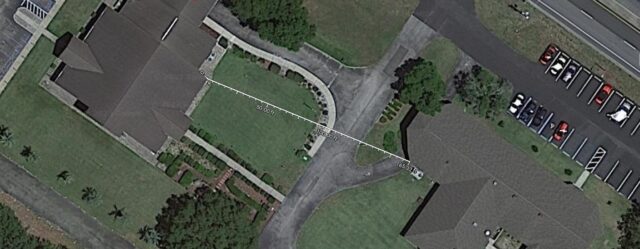
Use a laser level or smartphone apps to achieve precise alignment. Google Earth also comes in handy when finding a point of reference for aiming.
3. Configure Your Wireless Bridge
- Although most of our packages ship pre-configured, configuration can be easily adjusted.
-
Connect the bridge units to a PoE (Power over Ethernet) injector and plug into your network.
-
Access the web-based UI using a computer.
-
Set one unit as the Access Point (AP) and the other as the Station (Client).
-
Configure SSID, encryption (WPA2), and channel settings to avoid interference.
4. Test and Optimize the Connection
-
Run a speed test to ensure maximum throughput.
-
Adjust the antennas if necessary to improve signal strength.
-
Enable QoS (Quality of Service) for bandwidth prioritization.
Common Troubleshooting Tips
-
Weak Signal? Ensure antennas are properly aligned and free from obstructions.
-
Slow Speeds? Change the wireless channel to avoid interference from nearby networks.
-
Connection Drops? Check power supply and PoE injectors; upgrade to a higher-gain antenna if needed.
Why Buy from GNS Wireless?
-
Expert Support – Our team helps you pick the right wireless bridge for your application.
-
Pre-Configured Units – Order from us, and we’ll pre-configure your devices for plug-and-play installation…no additional charge.
-
High-Quality, Weatherproof Equipment – We only carry trusted, field-tested solutions.
Ready to eliminate cables and extend your network seamlessly?
📞 Call us today at 877-209-5152

